What is the problem with the magnetic float level gauge? In fact, there may be few opportunities for us to contact the magnetic suspension level gauge in our lives, but hardware designers and engineering designers should often need the problem of the magnetic suspension level gauge.The problem with the magnetic float level gauge.The problem with the magnetic float level gauge.The magnetic levitation level gauge also works according to the principle of buoyancy and magnetic coupling. There are three structures: the side-mounted magnetic levitation level gauge, the top mounting, and the bottom mounting the magnetic levitation level gauge, which can measure both the liquid level and the interface.When the liquid level in the container under test rises and falls, the magnetic float also rises and falls. The magnetic field lines of the magnetic steel in the float pass through the measuring tube, and the on-off of the reed switch is controlled through magnetic coupling, and the resistance component connected with the reed switch is changed. resistance. The sensor transmitter uses a voltage divider circuit to measure the liquid level, the voltage generated is proportional to the liquid level, the transmitter performs V/I conversion, and the final magnetic float level meter outputs the liquid with two-wire 4-20mA or three-wire 4-20mA Bit measurement signal.Common failures of magnetic float level gauges.Since the magnetic float level gauge is simple and easy to operate, it is the most common on site in the tower. Below, the editor of Huikeda Instrument will list some common problems and solutions:1. There is liquid in the tank, and the reason why it is not displayed is that the connection part of the container with the broken float and the density of the medium is blocked.Solution: Replace the float and unblock the connecting pipe.2. The reason for the frequent false liquid level phenomenon is that in the process of measuring the medium, there are problems with the float that produces foam due to tiny impurities and the dry yellow tube switch with weakened magnetic flaps.Solution: discharge the pontoon regularly. If the magnetism is weakened, you can use a magnetic rod to increase the magnetism many times. If there is a problem with dry yellow, you can only use a multimeter to measure the damaged part and use a shielding method.3. If there is remote transmission, the results of on-site and remote transmission may be different. First, check whether there is a problem with the float, then check whether there is a remote transmission converter, and finally check the wiring and system.Solution: Turn on after the dirt is discharged, check the float, measure the current signal with a multimeter, confirm that there is no problem with the system and wiring, and finally confirm the converter. Make the data consistent with the data we uploaded.The magnetic float level gauge needs to check the discharge of the float, and it must be operated in accordance with the operating rules: First, spread the felt under the discharge port to avoid polluting the floorContact the stop table with the main control room. After getting the permission of the main control room, fix the pollution pipe that can be used on the pollution valve, close the upper and lower pressure valves of the level gauge connected to the pollution barrel, first close the pressure valve, and then close the pressure valve. Slowly open the pollution valve and observe the pollution status of the pollution pipeAfter the liquid level cavity is discharged, after closing the discharge valve, open the sample tube to confirm whether it is smooth, then close the sample tube to confirm whether it is smooth, then close the discharge valve, put in the level gauge, open the sample tube, open the sample tube valve, and observe Whether the indicator is normalThe problem with the magnetic float level gauge.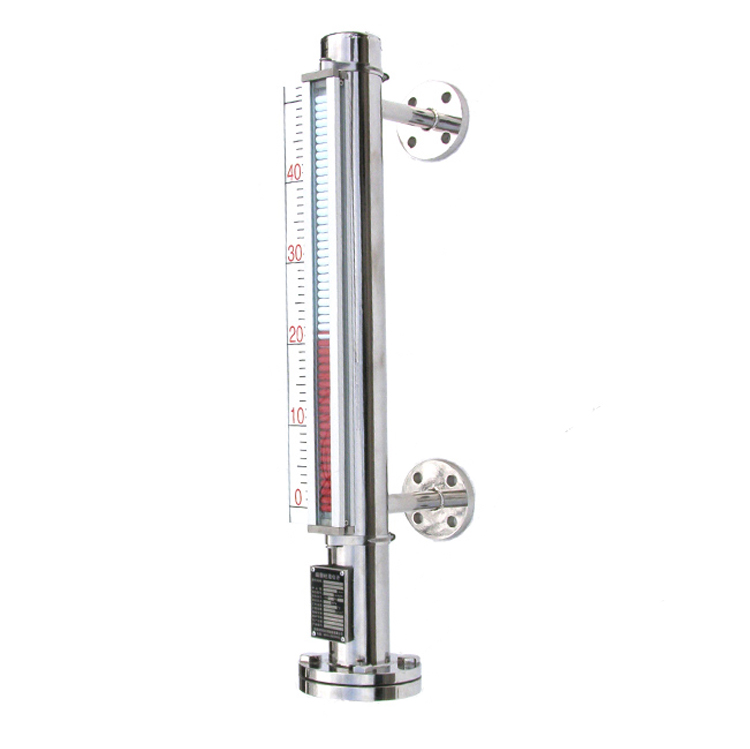 How to adjust the 0 points and full marks of the multimeter:First, put the liquid level at 0 o’clock, and measure the current signal with a multimeter. If the difference of about 4mA is not large, there is no problem at 0 o’clock. If the difference is too large, it needs to be adjusted. 0 o’clock screw, the left shift is small, the right shift is large, and the display value of the multimeter is 4 mA. In this way we can get 0 points. Then, we set the liquid level at 100% and measure the current signal with a multimeter. If the difference of about 20mA is not big, it means that there is no problem with full marks.If the difference is too large, it needs to be adjusted for us, full point screws, the left shift is small, the right shift is large, the display value of the multimeter is 20mA. So that we can get 20 points. Finally, we can discharge the medium to 0 point, measure with a multimeter, and then discharge the medium to 100%. Repeat the measurement several times. If the measurement is not correct, the linearity of the surface may be problematic and needs to be replaced.Some headers can be marked directly with buttonsSet 4mA point: press the up and down buttons at the same time for 1 second to enter the calibration mode. Establish a level of 0% of the container and press the down button for 1 second to set the output 4mA.Set 20mA point: press the up and down buttons at the same time for 1 second to enter the calibration mode. Establish the 100% liquid level of the container and press the down button for 1 second to set the output to 20mA.Use LCD to set the catalog calibration, the LCD provides the setting catalog by using the up, down, and SELECT buttons to display.Set 4mA point: In the CAL menu, enter the LRV (low range value) operation menu. Press SELECT to change this value and set the 4mA point.Set 20mA point: Under the CAL menu, enter the URV (high range value) operation menu. Press SELECT to change this value and set the 20mA point.When encountering the problem of the magnetic float level gauge, you must know how to solve it. Many people may not be experts in this area, but learning basic methods can also deal with emergencies well.
Post time: 21-09-21